UPDATE 02/26/2013: You can skip all these steps and use the install script on our github [LINK] page to automate the installation of MySQL. Then just install a management program (Sequel Pro) and you are all set!
UPDATE 10/9/2013: Be sure to check out our post on MySQL installation for OS X 10.9 Mavericks!
————
Install MySQL:
dev.mysql.com/downloads/mysql
Look for the DMG of the latest 64-bit version (10.6 will work)
Note: If you visit this link from a Mac it will automatically select the OS X Platform.

Install the mysql-5.x-osx10.x-x86_64.pkg
Install the MySQLStartupItem.pkg
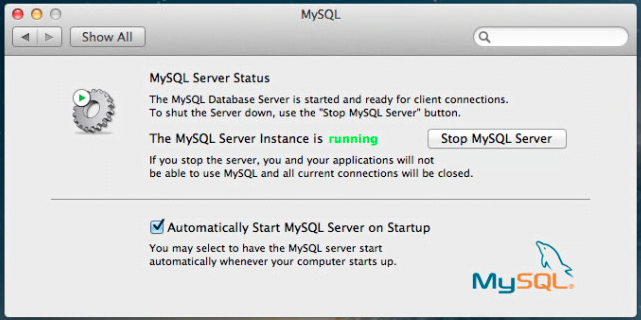
Install the MySQL.prefpane
– Start MySQL Server
– Check Automatically Start on startup
We need to do a few things from a command prompt. Note that commands need to be copied/pasted starting after the “$” prompt in the examples. Open up Terminal and issue this command:
vi .bash_profile
Use the ‘i’ key to go into insert mode, then paste in this line:
export PATH=$PATH:/usr/local/mysql/bin
Hit the ‘Esc’ key to exit insert mode and type “:wq” and hit enter to write and quit the editor.
Close the terminal window and open a new one. You can then enter this command:
mysql -u root
Enter the following command into the MySQL prompt, change ‘mypass’ to be a secure password for the MySQL root user.
GRANT ALL ON *.* TO 'root'@'localhost' IDENTIFIED BY 'mypass' WITH GRANT OPTION;

quit
The last command we’ll need to run in terminal will allow Apache and PHP to access MySQL:
sudo mkdir /var/mysql; sudo ln -s /tmp/mysql.sock /var/mysql/mysql.sock
Manage MySQL:
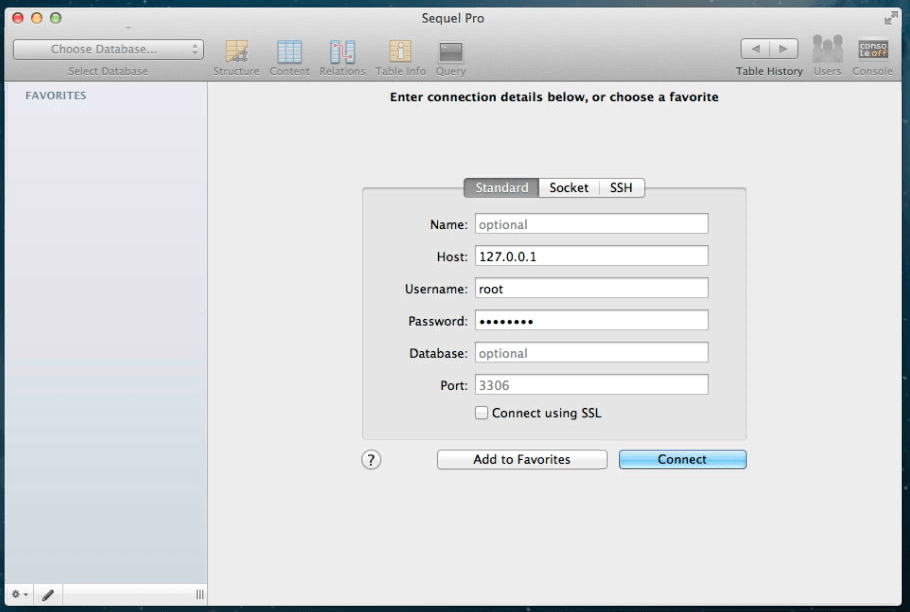
We recommend Sequel Pro for managing your databases. It can be downloaded at www.sequelpro.com.
Launch Sequel Pro. You can enter in ‘127.0.0.1’ for the Host along with ‘root’ and your password for login details and click connect. You can now create, edit, manage your MySQL databases.
Our next write up will show how to install WordPress within Server.app using the MySQL setup we just installed.
UPDATE: WordPress Install Script has been posted