The first step is to install MAMP PRO. During the installation you will need to authenticate your account. Upon launching MAMP PRO for the first time, an initialization prompt, password prompt, registration form, and a second password prompt will appear. To start the web server software, choose “Reset to Factory Settings” from the File menu and choose “Live”. Click the start button at the top of the MAMP PRO window and your web server is now live. From your local computer you can put the IP address of your Mac mini into a web browser and the default MAMP PRO index page will load.
These next steps may vary depending on where you want to store your files. In this example we are changing the ownership of the files to be owned by the web server. WordPress will have the ability to perform auto-upgrades, install plugins automatically, and use the bult in editors to make changes to theme and plugin files. If this is will be a production site you will want to make sure that WordPress is always up to date as well as certain aspects of your theme, most notably the timthumb.php/thumb.php files.
Start with creating the folder structure, downloading WordPress, and configuring the ownership.
Download WordPress by visiting this link in a web browser on your mini: http://wordpress.org/latest.tar.gz
sudo mkdir /Sites
sudo cp ~/Downloads/wordpress-3.2.1.tar /Sites
Note: the last line for the ‘cp’ command may be different depending on where you saved your download and the version downloaded.
The follow commands will uncompress WordPress, remove the original download file, rename the folder to ‘wordpresstest’, and update the ownership of the files and folders.
cd /Sites
sudo tar -xvf wordpress-3.2.1.tar
sudo rm wordpress-3.2.1.tar
sudo mv wordpress wordpresstest
sudo chown -R _www:staff /Sites
Create the virtual host within MAMP PRO, under the hosts tab. Use the screen shot below as a guide. Be sure to have your DNS record(s) for the hostname and aliases used pointing to your mini. Once you are completed save the virtual host and MAMP PRO will prompt to restart Apache.
The last step to the configuration is creating and setting a database. From the mini, visit http://127.0.0.1/MAMP/ in a browser. Use the phpMyAdmin tab to create a new database.
Once the database is created navigate to the privileges tab and click “Add a new User”. Fill out the username, password, and select local under the host field. Click “Go” at the bottom of the screen to create the database user.
Rename the wordpress config file and edit it with the commands below.
cd /Sites/wordpresstest
sudo mv wp-config-sample.php wp-config.php
sudo chmod 660 /Sites/wordpresstest/wp-config.php
sudo chmod 775 /Sites/wordpresstest/
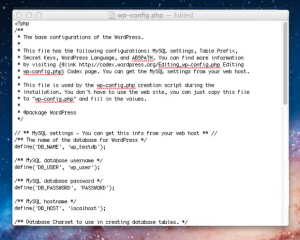
Within finder, open the hard drive and navigate to the Sites folder. Located inside the wordpresstest folder is the wp-config.php config file, edit it using Text Edit. Lion will prompt to unlock the file before editing it. Enter in the database name, user, and password and save the file.
Reset the ownership and permissions with the following commands.
sudo chown _www /Sites/wordpresstest/wp-config.php
 sudo chmod 600 /Sites/wordpresstest/wp-config.php
sudo chmod 755 /Sites/wordpresstest/
Visit the site in a web browser and complete the initial WordPress setup. Then you are ready to go!
Note: This tutorial only applies to hosting on a dedicated Mac. Depending on the method you choose for uploading files and your security needs you may want to adjust the file permissions configuration.


